Eyelash Extension Kit for Beginners: How to Choose
Eyelash extension kit for beginners is the perfect solution for those who want luscious, fuller lashes without spending hours in a salon.
Whether you're a beauty enthusiast or just starting out with DIY eyelash extensions, this informative, in-depth blog breaks down exactly what comes in a beginner kit, how to choose the right one for you, and how to use it safely and effectively.
In addition, lash expert Rockie Ng will examine lash types, care advice, best-rated kits, and answers to frequently asked concerns.
What is an eyelash extension kit for beginners?
Definition and Purpose
An eyelash extension kit for beginners is a carefully curated set of lash essentials created specifically for users new to lash application.
Unlike professional kits, which may include complex tools and fast-drying glues, beginner kits prioritize safety, ease of use, and a gentler learning curve.
They normally include all of the necessary tools for applying lashes without overwhelming the user.
These kits serve a dual purpose: providing beauty enthusiasts with a cost-effective way to get lash extensions at home and allowing aspiring lash artists to practice their skills before investing in more advanced tools.
With user-friendly instruction manuals and tools tailored for first-timers, a beginner kit is a valuable step into the lash world.
Who should use a beginner kit?
Beginner lash kits are ideal for several types of users. If you're someone who’s tired of applying mascara every day or wrestling with strip lashes, a DIY lash extension system offers a semi-permanent alternative with cleaner results.
These kits are also suitable for those exploring a lash career path, enabling them to practice safely at home.
Moreover, people with sensitive eyes or sparse lashes who wish to enhance their natural appearance often turn to these starter kits.
Thanks to slow-drying adhesives and beginner-safe materials, the learning curve becomes less intimidating and more accessible for home users.
Differences between beginner and professional kits
One key difference is that professional kits are built for speed and precision, think ultra-fast drying adhesives and a wider variety of lash curls and styles for different clients.
In contrast, beginner kits emphasize control, safety, and clearer guidance. For instance, glue in beginner sets usually has a drying time of 3 to 6 seconds, whereas professional glues often dry in under 1 second.
Tweezers in beginner kits are also ergonomically designed to help novice users gain confidence in application. Material quality varies too, but most beginner kits use pre-curled, synthetic PBT lashes for easy styling and longevity.
What’s typically included in a beginner lash extension kit?
Essential tools and supplies
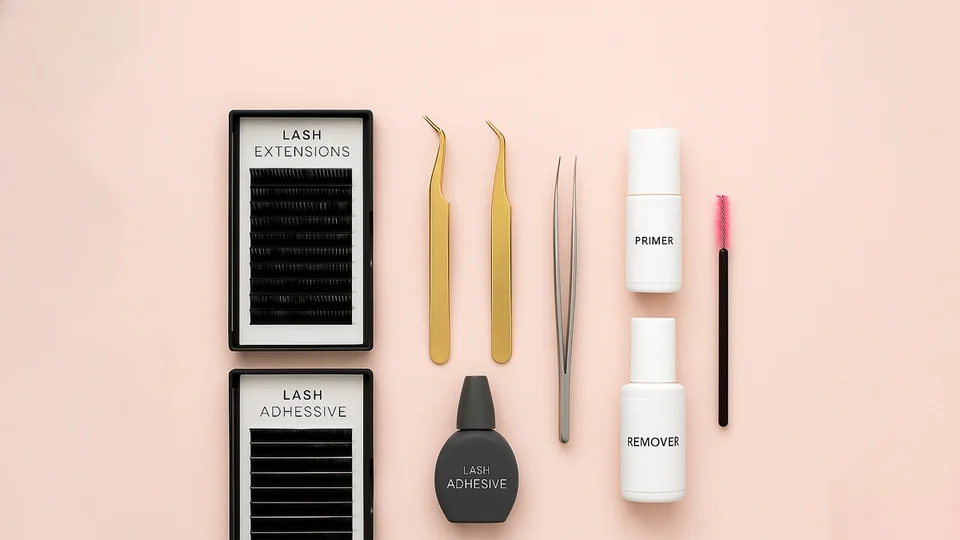
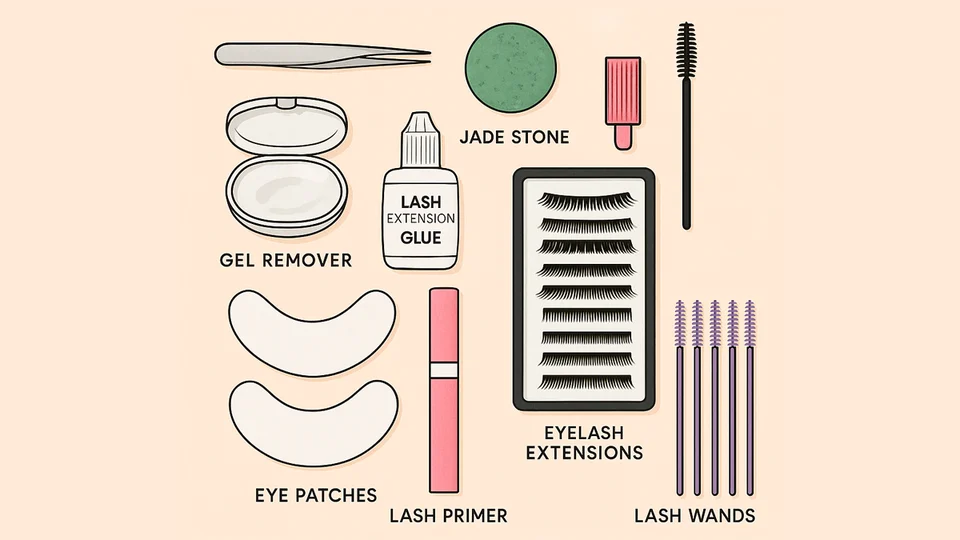
A good beginner lash extension kit simplifies the process by bundling key tools required for application. Let’s explore each one:
Lash trays (classic, volume, mixed lengths)
Lash trays include rows of individual lashes.
Kits will usually offer a mix of classic (single lash per natural lash), volume (multiple lightweight lashes), or hybrid styles (a blend of both) to help you test your preferred look.
They're organized by length, curl, and thickness, essential for customizing your style.
Adhesive (glue) and removers
Lash adhesives included in starter kits are specially formulated to be user-friendly.
They typically have slower drying speeds and lower fumes, reducing irritation risks.
Removers break down the glue safely in case of error or removal needs.
Tweezers (Straight and Curved)
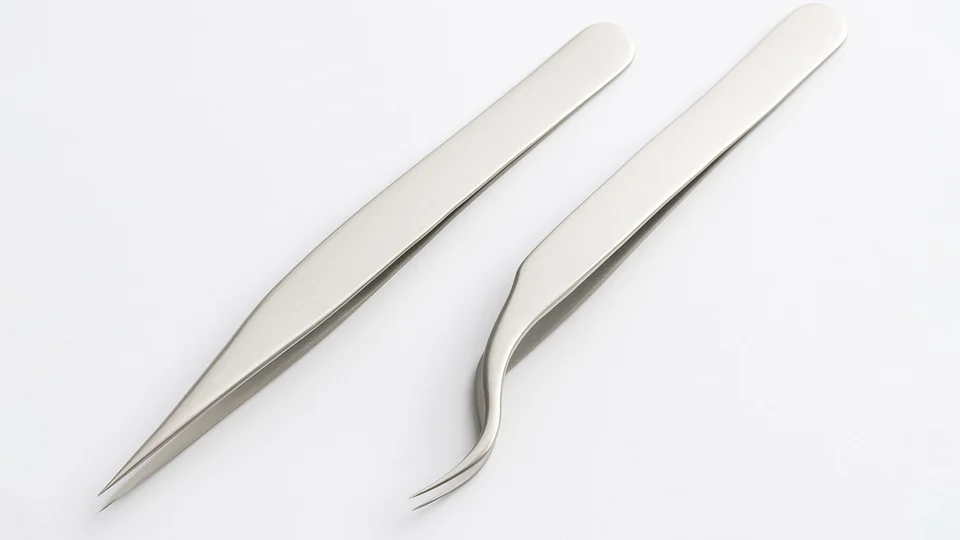
Tweezers are essential for lash isolation and placement. Straight tweezers help with separating natural lashes, while curved tweezers offer better angles for attaching extensions.
Some kits include both types for versatility during application.
Eye pads and tape
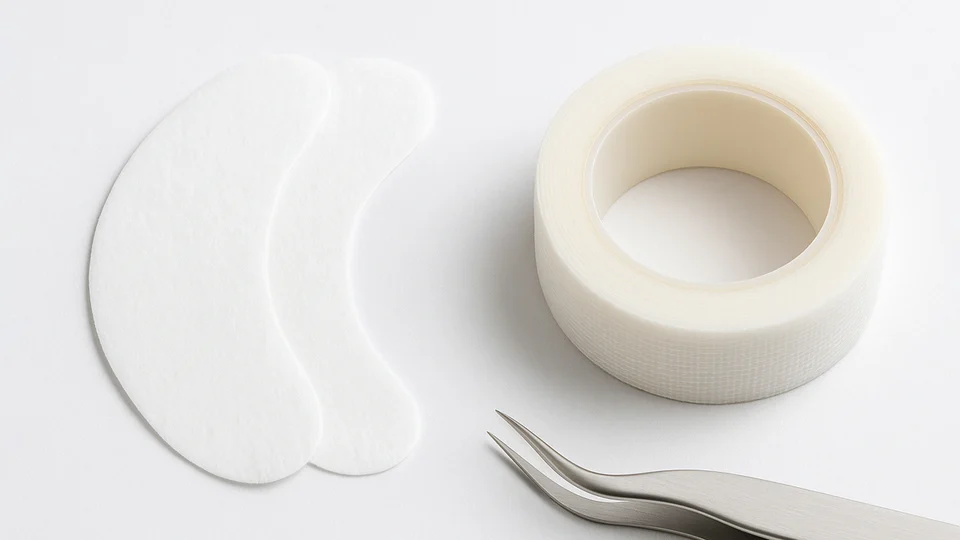
Under-eye pads protect the lower lash line and skin during lash application.
Lash tape also helps lift upper lids for better visibility.
Quality starter kits always include them to boost comfort and improve results.
Applicators and brushes
Brushes and mascara wands are key for grooming both natural and extended lashes.
They allow for even separation and improve lash definition post-application.
Applicators help align lashes before final curing.
Optional extras for practice
Practice mannequin head

Many kits include a mannequin head, perfect for developing application techniques without needing a live model.
It’s especially helpful for lash students or those preparing for certification.
Lash mapping stickers
Lash mapping is vital for creating balanced and symmetrical designs.
Stickers are guides that help you mark ideal lengths and curls for each part of the lash line, ensuring a structured and professional look even for beginners.
How to choose the best eyelash extension kit for beginners
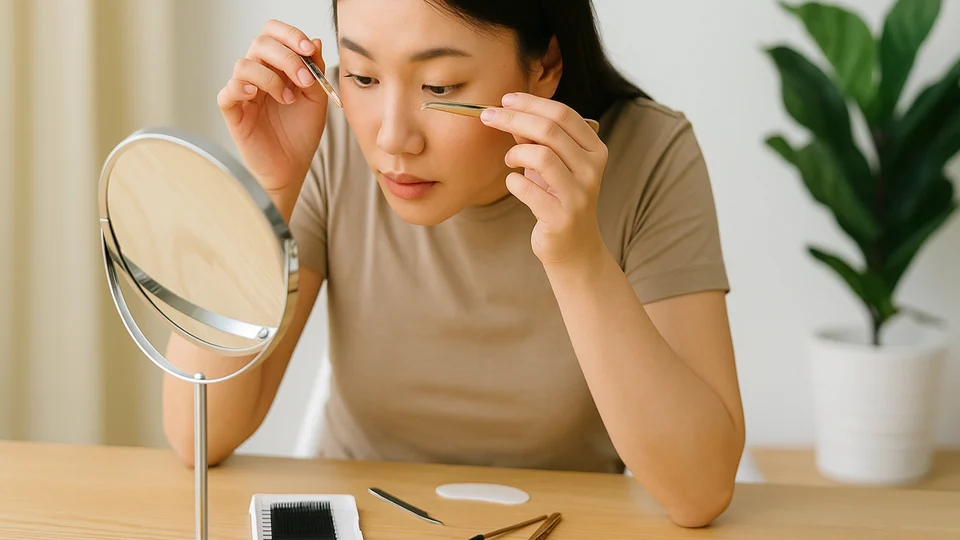
Assessing skill levels and learning goals
Before purchasing, evaluate your experience and objectives. Are you applying lashes for personal use, or are you seeking to become a certified artist?
If you’re simply exploring, start with a kit that includes a practice head and clear manuals. For those eyeing certification, choose a kit aligned with training programs.
Quality products and brand reputation
Check whether the brand uses high-grade materials like synthetic PBT lashes and cyanoacrylate-based glue with stabilizers.
Popular brands such as Napricot are known for prioritizing comfort, curl retention, and custom fits, elements essential in beginner-friendly experiences.
Furthermore, consider certifications, packaging clarity, and whether brands work with lash educators or communities. Reviews on third-party platforms add to their credibility.
Complete vs. partial kits
A complete kit includes every tool needed, from lash trays to glue and brushes, often with training aids.
Partial kits may only offer lashes and glue, best for users who already own applicators. Please review the component list thoroughly to ensure no additional purchases are necessary.
Customer reviews and ratings
Nothing beats hearing from real users. Look for feedback on comfort, ease of use, and retention time.
Consistently good ratings often reflect quality. On the flip side, pay attention to repeated issues like glue irritation or poor lash curl retention.
Budget considerations
Starter kits vary in price from $20 to over $100 based on inclusions and quality.
While budget-friendly kits are tempting, investing slightly more can give you better retention, accurate curls, and safer adhesives, critical when working near your eyes.
Lash types and styles: What to look for in a starter kit
Classic vs. volume vs. hybrid lashes
Classic lashes offer a 1:1 application and are perfect for achieving natural-looking enhancements.
Volume lashes (2D to 6D) provide density using multiple lightweight fans per natural lash.
Hybrid lashes mix both techniques, delivering a textured, wispy effect. Choose the lash type based on your desired final look.
Material types: Mink, silk, and synthetic
Beginner kits mainly use synthetic PBT lashes, praised for durability and low maintenance.
Faux mink delivers a fluffier look, while faux silk offers a balance between softness and structure. Real mink is rarely used in starter kits due to cost and ethical concerns.
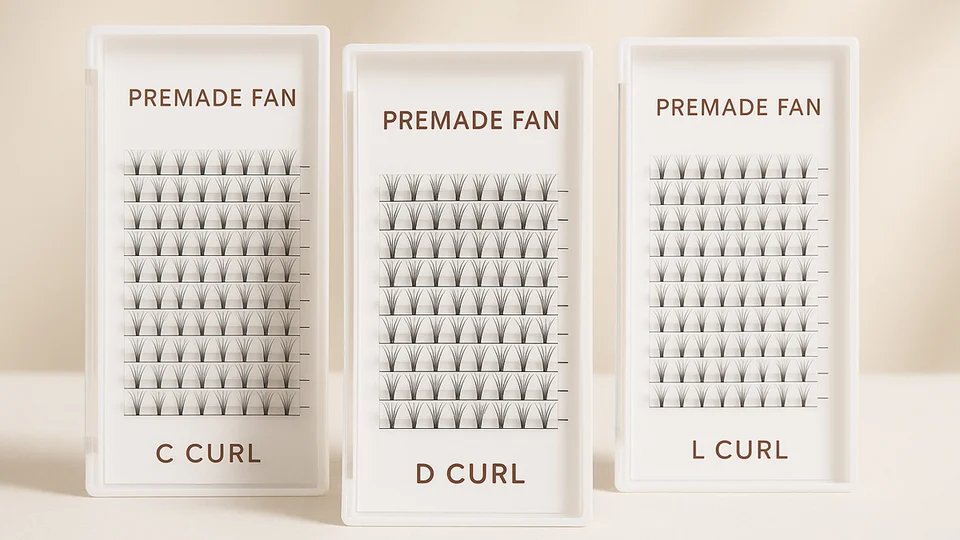
Curl types: C, D, L, and more
C curls offer a natural lift, while D curls are more dramatic, ideal for glam looks. L curls start straight at the base and then curl sharply, making them great for monolid eyes. A diverse curl tray in your kit allows experimentation to complement different eye shapes.
Among the most popular choices for beginners, C and D curls each create a distinct look. If you're curious about how they differ in style and retention, this comparison of C Curl and D Curl can help you decide which curl to start with.
Length and thickness options
Most kits include lashes ranging between 8mm and 15mm with different thicknesses (from 0.03mm for mega volume to 0.25mm for bold classics). Beginners should choose medium-length, lighter-thickness lashes for easier control and comfort.
Best eyelash extension kits for beginners: Top recommendations
Top 5 Eyelash Extension Starter Kits (2025)
- Napricot Beginner Lash Kit- Best Overall for Comfort and Curl Retention
- Lankiz DIY Lash Kit - Budget-friendly and popular on Amazon
- Stacy Lash Training Kit - Great for aspiring artists
- VAVALASH Pro Training Kit - Professional guidance included
- Lyon Lash Extension Practice Kit - Comes with mannequin and mapping gear
Kit comparisons: Pros and cons
Napricot offers unmatched comfort and custom fitting, but at a premium. Lankiz is affordable but uses less flexible lashes.
Stacy Lash comes with superb manuals but lacks glue removers. Match your priorities: longevity, ease, or cost.
User reviews and real-world feedback
According to community feedback, users love Napricot’s soft lashes and long-lasting curls.
Lankiz gets praise for affordability, while Stacy Lash is noted for professional training quality.
However, some struggle with low-grade glue in cheaper kits, highlighting the importance of research.
How to use an eyelash extension kit safely at home
Step-by-step guide for first-time users
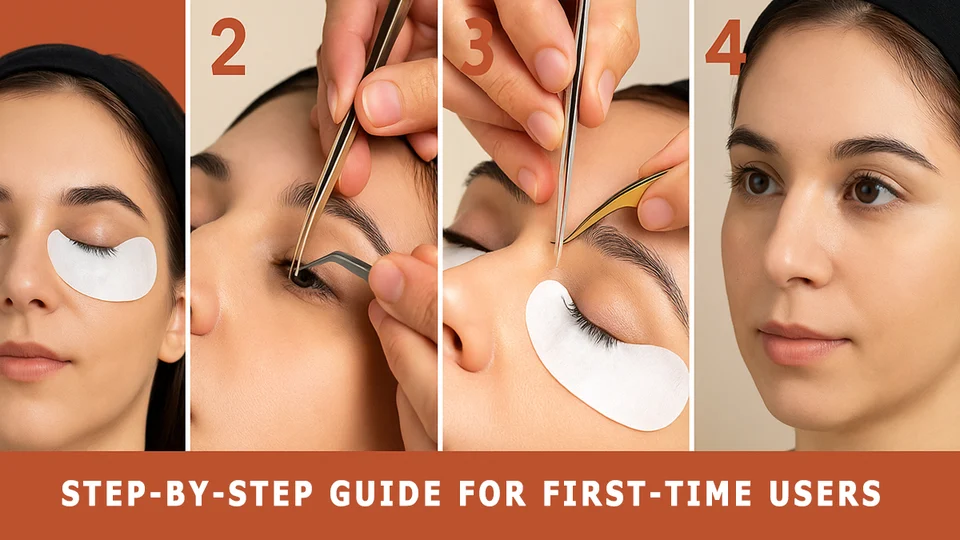
- Clean your lashes thoroughly.
- Apply eye pads.
- Isolate one natural lash with tweezers.
- Dip a single extension in adhesive.
- Gently attach to an isolated lash.
- Let it dry, then repeat.
- Comb out and check uniformity.
Common mistakes to avoid
- Using too much glue
- Attaching lashes to multiple natural lashes
- Skipping lash mapping.
- Not cleaning tools
Avoiding these mistakes ensures not just better lashes but healthier eyes.
Safety tips and hygiene practices
Always apply in a well-lit, clean space. Sanitize tools before and after.
Avoid contact with your waterline and discontinue use if irritation occurs. Prioritize safety over speed.
Training & learning resources for lash extension beginners
Online courses and video tutorials
Platforms like Udemy, Skillshare, and YouTube have beginner-tailored lash extension tutorials. Look for certified educators and hands-on examples for the best success.
Certification programs to consider
After practicing with an eyelash extension kit for beginners and building basic skills, many students proceed to certified programs by brands like NovaLash, LashBoxLA, or institutions like The Lash Professional. Certification boosts credibility and skill.
Facebook groups and lash communities
Join groups like “Lash Artists Support” or “DIY Lash Extensions” to share tips, troubleshoot, or get feedback from seasoned artists. Community support speeds up your learning curve.
Maintenance & aftercare: Extending the life of your lashes
Proper cleaning products and tools
Use lash-safe foaming cleansers and soft brushes daily. Avoid cotton swabs and oil-based products, which break down adhesives and shorten retention.
When to refill or remove extensions
Extensions naturally shed with your lash cycle every 2–4 weeks. Refill every two weeks for the best appearance. Use removers gently to avoid tugging and damaging natural lashes.
Tips to prevent lash damage
Sleep on your back, avoid rubbing your eyes, and don’t pick at your lashes. Limit waterproof makeup that’s difficult to clean. Gentleness is the secret to lash health.
As you gain more experience and move toward advanced lash training, understanding how to work with premade lash fans becomes an essential skill. You can learn more about the different types and techniques in this comprehensive guide to premade lash fans.
Eyelash extension kit for beginners: FAQs
How to make eyelash extensions last longer?
To make your eyelash extensions last longer, start by following a proper aftercare routine. Avoid getting your lashes wet for the first 24 to 48 hours after application to allow the adhesive to fully cure. Steer clear of oil-based products around your eyes, as these can break down the lash glue. Gently clean your lashes daily with a lash-safe cleanser to remove dirt and oil buildup. Lastly, avoid rubbing your eyes or sleeping face-down, as this can cause premature lash shedding.
How often do you need to redo your lash extensions?
Most lash extensions need to be refilled every 2 to 3 weeks to maintain a full, fresh look. The exact timing depends on your natural lash growth cycle, how well you care for your extensions, and the type of adhesive used. If you are using a beginner lash kit at home, you may find that touch-ups are needed more frequently, as application techniques improve with practice.
How do you remove lash extensions at home?
If you need to remove lash extensions at home, always use a professional lash adhesive remover. Never pull or tug at your lashes, as this can damage your natural lashes. Apply the remover according to the product instructions, typically by gently coating the base of the lashes and allowing it to sit for several minutes. After the glue has broken down, you can carefully slide the extensions off using a clean applicator or brush. Be patient and gentle to avoid harming your natural lashes.
What is a lash primer, and are they beneficial for lashes?
A lash primer is a product used before applying lash extensions to cleanse and prep the natural lashes. It removes residual oils, makeup, and debris that can interfere with adhesive bonding. Using a lash primer can help improve glue retention, making your extensions last longer. For beginners, adding a lash primer to your kit is a simple step that can significantly enhance your lash results.
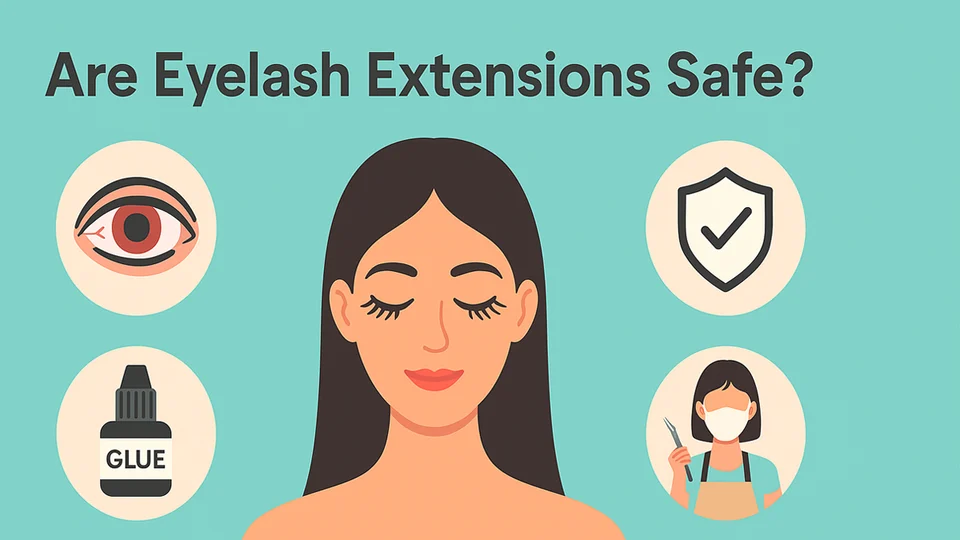
Are eyelash extensions safe?
When applied correctly with professional-grade products, eyelash extensions are generally safe. However, it is important to follow best practices and use trusted products to minimize risks. Potential issues can include allergic reactions to adhesive, irritation, or lash damage from improper application or removal. Beginners should always perform a patch test with adhesive and follow detailed instructions when using a lash extension kit at home.
Conclusion
Choosing the right eyelash extension kit for beginners is your first step toward stunning lashes and self-confidence.
With the right knowledge, tools, and support, anyone can learn the art of eyelash extension safely and beautifully at home.
At Napricot, we believe lash beauty should be accessible, customizable, and most importantly comfortable.
Whether you’re diving into DIY for convenience or starting a professional journey, there’s a perfect beginner kit waiting for you.
About Author
Rockie Ng is a certified lash artist and the founder of Napricot, a brand specializing in high-quality premade lash fans. With over 6 years of hands-on experience in the lash extension industry, she has worked with thousands of lash artists worldwide to improve application techniques, retention, and styling outcomes.
Rockie is passionate about bridging the gap between product quality and lash education. Through Napricot, she actively shares insights on lash trends, technical guidance, and product innovations to help lash professionals deliver better results faster and safer.