How do I straighten my crooked eyelashes? - 5 Methods That Actually Work
Crooked eyelashes might seem like a minor cosmetic issue until they start poking your eye or creating an uneven appearance that makeup can't fix. Those stubborn, misaligned lashes can cause daily frustration and make even simple tasks like applying mascara a challenge.
The constant irritation and awkward angles can leave you feeling self-conscious about your eye area. Fortunately, there are proven methods to straighten even the most stubborn crooked lashes safely and effectively.
In this comprehensive guide, Napricot will show you exactly how to straighten eyelash using five different approaches, from gentle daily techniques to professional treatments that deliver lasting results.
How to Straighten Out Eyelash - Complete Method Overview
When learning how to straighten eyelash effectively, understanding the fundamental approach is crucial for success. This comprehensive overview covers everything you need to know about how to straighten out eyelash using proven techniques.
The Science Behind Eyelash Straightening Eyelashes are made of keratin, the same protein found in hair. When you learn how to straighten eyelash properly, you're essentially working to restructure this keratin temporarily or permanently.
The key to successful eyelash straightening lies in understanding how heat, moisture, and gentle pressure can reshape these delicate fibers.
Essential Steps for Any Straightening Method:
- Start with clean lashes - Remove all makeup and oils that could interfere with treatment
- Assess your lash condition - Determine whether your lashes are simply bent, over-curled, or damaged
- Choose appropriate method - Select techniques based on your specific lash type and desired timeline
- Apply consistent pressure - Use gentle, sustained pressure in the desired direction
- Maintain results - Implement daily maintenance routines to prevent regression
Key Success Factors for How to Straighten Eyelash:
- Patience over force - Gentle daily techniques work better than aggressive single treatments
- Consistency is critical - Daily 5-minute sessions outperform weekly intensive treatments
- Heat helps - Controlled warmth makes lashes more pliable for reshaping
- Conditioning prevents damage - Keep lashes moisturized throughout the straightening process
- Individual results vary - What works quickly for some may take longer for others
Common Mistakes When Learning How to Straighten Out Eyelash:
- Using too much heat or pressure, which can damage or break lashes
- Expecting overnight results from gentle methods
- Skipping the conditioning step, leading to brittle, damaged lashes
- Using inappropriate tools not designed for the delicate eye area
- Ignoring safety warnings and continuing despite irritation
This foundation knowledge prepares you for the specific methods detailed below, ensuring you approach eyelash straightening safely and effectively.
Understanding Why Eyelashes Become Crooked
Most crooked lashes develop from identifiable causes that affect the natural growth and positioning patterns. Understanding why your lashes became crooked helps you choose the most effective approach for how to straighten eyelash in your specific situation.
Genetic Factors Some people naturally grow lashes that curve in different directions or have irregular growth patterns. This genetic trait often runs in families and typically affects multiple lashes rather than just isolated ones.
External Causes
- Sleeping positions: Pressing your face into pillows bends lashes overnight
- Previous lash treatments: Failed perms, extensions, or curling damage can leave lashes permanently misshapen
- Mascara buildup: Heavy mascara use without proper removal weighs down lashes and alters their natural curve
- Rubbing habits: Frequent eye rubbing from allergies or fatigue disrupts lash alignment
Types of Lash Problems
- Bent lashes: Individual lashes that stick out at odd angles
- Twisted lashes: Lashes that spiral or corkscrew instead of laying flat
- Over-curled lashes: Lashes that curl too dramatically upward or inward toward the eye
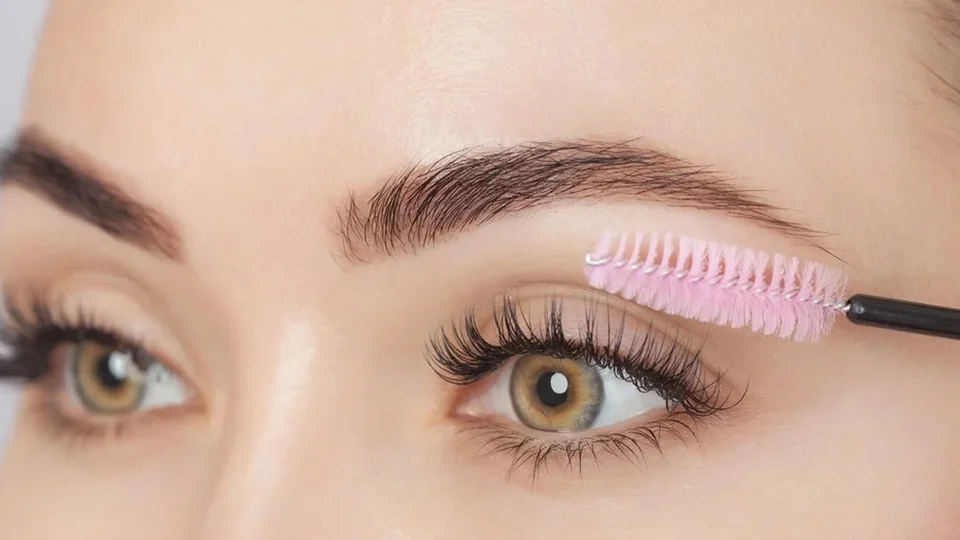
Method 1: Daily Spoolie Brush Technique
The spoolie brush method provides the gentlest approach for how to straighten eyelash gradually, training your lashes into proper alignment over time. This technique represents the safest way to learn how to straighten out eyelash for those with mildly crooked lashes, requiring daily consistency for optimal results.
What You Need:
- Clean spoolie brush (mascara wand style)
- Optional: clear lash serum or conditioning oil
Step-by-Step Process:
- Clean your lashes completely, removing all makeup and oils
- Hold the spoolie horizontally at the base of your lash line
- Gently brush upward in slow, controlled strokes, focusing on misaligned lashes
- Apply light pressure - avoid aggressive brushing that could damage follicles
- Work section by section across your entire lash line
- Finish with downward strokes to set lashes in the desired position
- Repeat twice daily - morning and evening for best results
Timeline Expectations (Results Vary by Individual):
- Mild crooked lashes: 2-3 weeks of consistent use for some users
- Moderately bent lashes: 4-6 weeks (individual results may vary significantly)
- Severely misaligned lashes: 6-8 weeks or may require additional methods
- Note: Timeline varies greatly depending on genetics, lash condition, and individual response to treatment
Pro Tips:
- Use a metal spoolie for better control than plastic versions
- Apply gentle heat with a hair dryer on cool setting while brushing
- Add a drop of castor oil to the spoolie for conditioning benefits
Method 2: Warm Compress + Gentle Reshaping
Heat temporarily softens the keratin structure in your lashes, making them more pliable for reshaping. This method provides faster results than brushing alone but requires careful temperature control.
What You Need:
- Clean washcloth or cotton pads
- Warm (not hot) water
- Spoolie brush or clean fingers
- Optional: eye-safe oil for conditioning
Step-by-Step Process:
- Soak washcloth in warm water (test temperature on wrist first)
- Wring out excess water to prevent dripping
- Place compress over closed eyes for 3-5 minutes
- Remove compress and immediately begin gentle reshaping
- Use spoolie or fingers to guide lashes into desired position
- Hold each section for 10-15 seconds while cooling
- Repeat process 2-3 times per session
- Apply conditioning oil if lashes feel dry
Safety Warnings:
- Water temperature should feel warm, never hot enough to cause discomfort
- Avoid steam treatments which can damage delicate eye area skin
- Stop immediately if you experience any irritation or redness
- Never pull or force lashes into position
Expected Timeline (Individual Variation Expected):
- Week 1: Lashes feel softer and more manageable for most users
- Week 2: Some users notice reduction in curl intensity (results not guaranteed)
- Week 3: Individual results vary widely - some see improvement, others may not
- Week 4+: Continued improvement possible but depends on individual lash response
Method 3: Vaseline Straightening Method (Overnight) - Expert Opinions Vary
The overnight vaseline method has mixed reviews from beauty professionals, with some experts supporting its use while others recommend caution with petroleum-based products near the eyes.
Expert Opinion Disclaimer: The American Academy of Ophthalmology states that small amounts of Vaseline are generally safe for lash use, while some beauty professionals caution against petroleum-based products on lashes, especially if you use lash extensions. Individual tolerance varies significantly.
What You Need:
- Pure petroleum jelly (Vaseline brand recommended)
- Clean spoolie brush or cotton swab
- Gentle eye makeup remover for morning cleanup
Application Process:
- Patch test first - Apply small amount to wrist, wait 24 hours for any reaction
- Remove all eye makeup thoroughly before application
- Apply very thin layer of vaseline to lashes using clean spoolie
- Focus on problem areas where lashes are most crooked
- Gently brush lashes downward while vaseline is still fresh
- Sleep with treatment on for 6-8 hours minimum
- Remove carefully in morning with gentle cleanser
- Repeat nightly for 2-3 weeks
Expected Timeline (Individual Results Vary):
- Week 1: Lashes may feel softer and more manageable
- Week 2: Some users notice reduction in curl intensity
- Week 3: Results vary widely - some see significant straightening
- Week 4+: Continued use may provide additional benefits for some individuals
Important Considerations:
- Not suitable for lash extension wearers - petroleum products can break down adhesives
- Some people experience temporary puffiness from overnight petroleum jelly use
- Always use clean application tools to prevent bacterial infections
- Discontinue immediately if you develop any allergic reactions or persistent irritation
- Results vary significantly based on natural lash curl pattern and individual skin sensitivity
Method 4: Heated Lash Tools - High Risk, Professional Recommended
IMPORTANT SAFETY WARNING: Heated lash tools carry significant risk of burns, lash damage, and eye injury. Many beauty professionals recommend avoiding heated tools near the delicate eye area unless used by trained professionals.

Heated eyelash tools provide immediate results by using controlled heat to reshape lashes, but the risks often outweigh the benefits for home use.
Tool Options (Professional Use Recommended):
- Heated eyelash combs: Designed specifically for lash straightening
- Mini hair straighteners: Must be specifically designed for eye area use - never use regular hair tools
- Heated spoolie brushes: Combine brushing with gentle heat application
Critical Safety Guidelines:
- Consider professional treatment instead - safer and more effective
- Use only the lowest heat setting available on your specific device
- Test temperature extensively on back of hand before any eye area contact
- Work only on completely clean, dry lashes
- Use extremely short contact periods - 2-3 seconds maximum per section
- Move tool continuously to prevent heat concentration and burns
- Allow complete cooling between applications to same area
- Have emergency plan - know how to treat minor burns immediately
Step-by-Step Technique (Use at Your Own Risk):
- Pre-heat tool to the lowest setting available on your specific device
- Section lashes into very small groups for controlled application
- Place tool at lash base and gently draw downward with minimal pressure
- Hold lashes straight for 5-10 seconds after heat application
- Repeat on remaining sections with mandatory cool-down periods
- Apply intensive conditioning serum immediately to prevent heat damage
Enhanced Safety Warnings:
- Never use regular hair straighteners or curling irons near eyes - designed temperatures are dangerously high
- Stop immediately if lashes become brittle, break easily, or change texture
- Discontinue use if you experience any eye irritation, redness, or vision changes
- Consult eye care professional first if you have sensitive eyes, wear contact lenses, or have any eye conditions
- Limit use to maximum once per week - daily or frequent use will damage lashes permanently
- Keep emergency contact information for your eye doctor readily available during use
Professional Alternative Recommended: Given the significant risks involved, most beauty experts recommend seeking professional heated lash straightening rather than attempting at-home heated treatments.
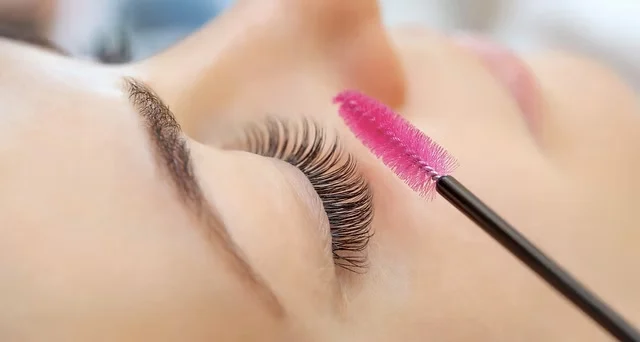
Method 5: Professional Lash Straightening
Professional treatments provide the most dramatic and long-lasting results, especially for severely crooked or genetically curved lashes that don't respond well to home methods.
Professional Options Available:
Lash Lift Reversal Treatment
- Designed specifically to counteract previous lash lift procedures
- Uses chemical solutions to relax curl pattern
- Results last 6-8 weeks
- Cost range: $60-120 (varies by location and treatment complexity)
Chemical Lash Relaxing
- Similar to hair relaxing treatments but formulated for eye area
- Permanently alters lash structure
- One-time treatment with lasting results
- Requires experienced technician for safety
- Cost range: $80-200 (varies by location and treatment type)
Thermal Lash Straightening
- Professional-grade heated tools used by trained technicians
- Immediate results with proper technique
- Often combined with conditioning treatments
- Follow-up appointments recommended
- Cost range: $60-150 (varies by location and additional services)
Choosing a Qualified Professional:
- Look for licensed cosmetologists with lash specialization training
- Read reviews specifically mentioning lash straightening services
- Ask about their experience with corrective lash treatments
- Verify they use high-quality, eye-safe products
- Schedule consultation before booking full treatment
Questions to Ask During Consultation:
- How many lash straightening procedures have you performed?
- What products and techniques do you use?
- What results can I realistically expect?
- How long will results last?
- What aftercare is required?
- What are the potential risks or side effects?
Prevention Tips for Straight Lashes
Preventing future lash crookedness requires addressing the underlying causes and establishing protective daily habits.
Sleep Position Adjustments:
- Use silk or satin pillowcases to reduce friction
- Train yourself to sleep on your back when possible
- Consider a contoured sleep mask that doesn't press against lashes
- Replace old, lumpy pillows that force unnatural face positions
Daily Maintenance Routine:
- Remove eye makeup completely every night using gentle techniques
- Avoid waterproof mascara for daily wear
- Use an eyelash curler properly if needed, but don't over-curl
- Apply lash conditioning serum before bed
- Brush lashes with clean spoolie each morning
Protecting Lashes During Activities:
- Wear protective eyewear during sports or windy conditions
- Avoid rubbing eyes when tired or experiencing allergies
- Use high-quality makeup products that don't require aggressive removal
- Take breaks from false eyelashes and extensions
Regular Lash Health Maintenance:
- Trim extremely long lashes that tend to bend or twist
- Use gentle, oil-based makeup removers
- Apply castor oil treatments weekly for strengthening
- Schedule regular check-ups with eye care professionals
When to Consult a Professional
Certain situations require professional evaluation rather than continued home treatment attempts.
Seek Professional Help When:
- Home methods show no improvement after 6-8 weeks of consistent use
- Lashes are breaking or becoming more damaged with treatment
- You experience persistent irritation or allergic reactions
- Crooked lashes interfere with vision or cause eye discomfort
- You have underlying eye conditions or wear contact lenses
- Previous professional treatments resulted in severe lash damage
Red Flag Symptoms:
- Increased lash loss or thinning
- Persistent redness or swelling around lash line
- Development of bumps or irritation along eyelid
- Changes in vision or eye comfort
- Signs of infection such as discharge or crusting
Professional Evaluation Benefits:
- Accurate diagnosis of underlying causes
- Access to professional-grade treatment options
- Safety monitoring throughout treatment process
- Customized treatment plans based on your specific needs
- Long-term maintenance recommendations
Comparing Straightening Methods
Method | Timeline | Cost | Effectiveness | Safety Level | Best For | Important Notes |
|---|---|---|---|---|---|---|
Spoolie Brush | 2–8 weeks | $5–15 | Mild–Moderate | Very Safe | Daily maintenance, mild crookedness | Results vary by individual |
Warm Compress | 1–3 weeks | $0–10 | Moderate | Safe with care | Heat-responsive lashes | Timeline depends on individual response |
Vaseline Treatment | 2–4 weeks | $3–8 | Moderate–High | Safe for most | Over-curled lashes | Results vary widely. Expert opinions mixed |
Heated Tools | Immediate | $20–80 | High | HIGH RISK | Quick results needed | Professional use recommended |
Professional | 1 session | $60–200 | Very High | Highest when done properly | Severe cases, long-term results | Varies by location and treatment type |
Combination Approach: Many people achieve the best results when learning how to straighten eyelash by combining multiple methods. Start with gentler approaches like spoolie brushing and warm compresses, then progress to heated tools or professional treatment if needed. This graduated approach to how to straighten out eyelash minimizes risks while maximizing effectiveness.
Maintenance After Success: Once you achieve straight lashes, maintain results with daily spoolie brushing and weekly conditioning treatments. Avoid habits that originally caused the crookedness to prevent regression.
Conclusion
Straightening crooked eyelashes requires patience and the right technique for your specific situation. Whether you choose gentle spoolie brushing, warm compresses, vaseline treatments, heated tools, or professional help, the key to successful results in how to straighten eyelash lies in consistency over intensity.
The most effective approach to how to straighten out eyelash starts with gentle daily care and progresses to more intensive treatments only when needed. Always prioritize eye safety and stop any method that causes irritation or discomfort.