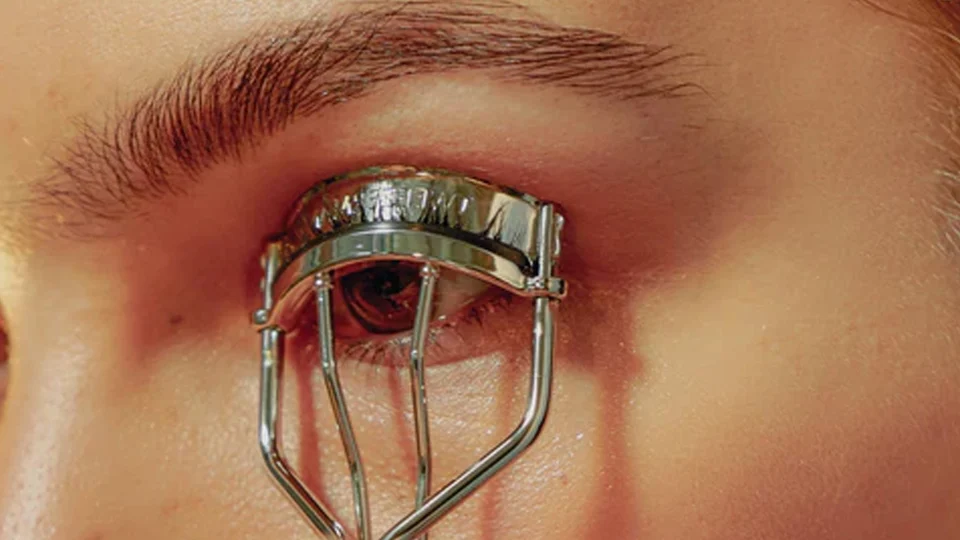
How to Fix and Tighten Your Eyelash Curler
To fix and tighten your eyelash curler, start by checking if the screws securing the handle to the curler head are loose - if so, use a small screwdriver to tighten them gently.
For loose hinges, gently squeeze the curler together to tighten it, and replace worn rubber pads that have lost elasticity.
Most common issues include loose screws, damaged pads, bent frames, and sticky mechanisms - all fixable with basic tools and replacement parts.
Common Eyelash Curler Problems and Causes
Why Your Eyelash Curler Becomes Loose
The hinge is a key component that holds the curler together. Over time, repeated use can weaken the hinge, causing it to loosen. Other factors include:
- Loose Screws: Eyelash curlers often have small screws that secure the handle to the curler head. If these screws become loose, the curler can wobble
- Worn-Out Pads: The pads on the curler head can wear out over time, reducing their grip on the lashes and causing the curler to slip
- Damaged Frame: The frame of the curler can become bent or damaged, affecting the alignment of the curler head and causing it to loosen
- Excessive Pressure: Applying excessive pressure while curling your lashes can put strain on the curler, leading to loosening
How to Tighten Your Eyelash Curler: Step-by-Step
Method 1: Tightening Loose Screws
What You'll Need:
- Small screwdriver (usually Phillips head)
- Good lighting
- Magnifying glass (optional)
Steps:
- Locate the Screws: Examine your curler for small screws, typically found where the handles attach to the curler head
- Test for Looseness: Gently wiggle the handles to identify loose connections
- Tighten Carefully: Use a small screwdriver to tighten them gently - avoid overtightening which can strip the threads
- Test the Action: Open and close the curler to ensure smooth operation
Method 2: Fixing Loose Hinges
Steps:
- Identify Hinge Issues: Check if the curler doesn't stay closed properly
- Gentle Adjustment: If the hinge is loose, you can try tightening it by gently squeezing the curler together
- Check Alignment: Make sure that the curler head is properly aligned with the frame
- Avoid Over-tightening: Do not overtighten the hinge, as this can damage it
How to Fix Other Eyelash Curler Issues
Replacing Worn Rubber Pads
When to Replace: If the rubber has lost its elasticity, it is time for a replacement. Signs include:
- Cracked or torn rubber
- Hard, inflexible material
- Uneven curling results
- Lashes sticking to the pad
Replacement Steps:
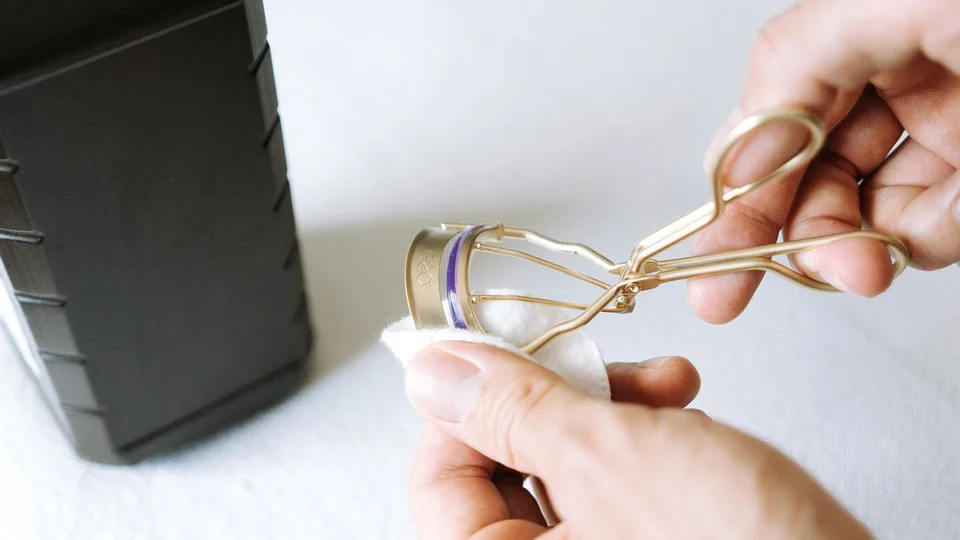
- Remove Old Pads: Take off the old rubber gently from the eyelash curler using your fingers or a pair of tweezers
- Clean the Area: Clean the eyelash curler so it's nice and tidy. You can use a mild cleanser or rubbing alcohol on a cotton pad
- Prepare New Rubber: Cut a new piece of rubber that's the same as the old one
- Install Carefully: Put the new rubber on the curler carefully. Make sure it fits well in the right spot
- Secure in Place: Some eyelash curlers have a mechanism to secure the rubber pad in place. If your curler has a lock, use it to keep the new rubber in place
Fixing Bent or Misaligned Curlers
The curler no longer curls lashes evenly or pinches them when bent. Here's how to fix it:
Repair Process:
- Assess the Damage: Check where the curler is bent or misaligned
- Gentle Reshaping: Gently use a pair of pliers to reshape the curler or adjust the alignment. Avoid overtightening
- Test Alignment: Ensure the curler pads meet evenly when closed
- Safety Check: Make sure there are no sharp edges that could harm your lashes
Dealing with Rust and Corrosion
Cleaning Process: Soak the curler in a vinegar solution for a few minutes. Rinse thoroughly and dry completely before using
Prevention:
- Dry the curler thoroughly after cleaning to prevent rust
- Apply a small amount of oil to the metal parts to keep them from rusting
Fixing Sticky Mechanisms
For curlers that don't open or close smoothly: Apply a small amount of rubbing alcohol to a cotton swab and clean the mechanism. Let the alcohol evaporate before using
How to Fix a Broken Eyelash Curler
When your curler has suffered significant damage, these repair methods may help:
Broken Handle Repair:
- Assess the Break: Check if the handle has completely snapped or is just cracked
- Clean Surfaces: Remove any debris from the broken edges
- SAFETY WARNING: Epoxy glue near the eye area poses chemical risks and may not withstand repeated use cycles
- Recommendation: Replace the entire curler if the handle is severely broken rather than attempting repairs with adhesives
- Temporary Use Only: If repair is attempted, consider it temporary and replace as soon as possible
Completely Separated Parts:
- Hinge Failure: If the main hinge has broken completely, the curler is beyond safe repair
- Spring Mechanism: Broken internal springs require immediate replacement, not repair
- Multiple Break Points: When several components are damaged, replacement is the only safe option
NEVER USE THESE NEAR YOUR EYES:
- Super glue or cyanoacrylate adhesives
- Strong chemical solvents
- Household tape as permanent fixes
- Any repair method involving toxic substances
Emergency Temporary Fixes (Use with Extreme Caution):
- These methods should only be used in emergencies and replaced immediately:
- Medical Tape: Only for minor cracks, replace within 24 hours
- Professional Assessment: Have any damage assessed by beauty professionals when possible
CRITICAL: Prioritize eye safety over saving money - replace damaged curlers promptly.
Maintenance Tips to Prevent Future Problems
Daily Care
Cleaning Routine:
- Clean your curler with rubbing alcohol immediately after each use to prevent bacteria and infection
- Use 70% isopropyl alcohol on a cotton pad for thorough sanitization
- Remove makeup residue after every curling session
- Deep clean weekly with mild soap if used daily
Proper Usage:
- Use less pressure - avoid applying excessive pressure while curling your lashes
- Avoid using the curler on wet or damp lashes
- Be gentle when using the curler to prevent damage to your lashes
Long-term Maintenance
Enhanced Storage & Rust Prevention:
- Store in a completely dry location away from bathroom humidity
- Allow curler to air dry completely before storage
- Apply a thin layer of mineral oil to metal parts monthly to prevent oxidation
- Use a protective case or pouch to prevent damage
- Avoid temperature extremes that can affect metal and rubber components
Regular Replacement Schedule:
- Replace rubber pads every 2-3 months to maintain curling effectiveness and eye safety
- Replace entire curler every 6-12 months, or sooner if pads lose elasticity, hinges are severely damaged, or frame is seriously deformed
- Heavy users should consider more frequent replacement
When to Replace vs. Repair Your Curler
Repairable Issues:
- Loose screws
- Worn rubber pads
- Minor rust spots
- Slightly bent frames
- Sticky mechanisms
Replacement Indicators:
- If the rust is severe, consider replacing the curler
- Broken hinges that can't be tightened
- If the handle is irreparably damaged, replace the entire curler
- Severely warped frames
- Missing critical components
Safety Precautions
Important Warnings:
- Never use damaged curlers near your eyes
- Do not share your eyelash curler with others. This can introduce bacteria and damage the curler
- It is not recommended to use an eyelash curler on false lashes, as it can damage or dislodge them
- Always test repairs before use on lashes
Eye Safety:
- Clean hands before handling the curler
- Replace worn parts immediately
- Stop using if you experience any eye irritation
Professional Tips for Better Results
Warming Technique for Enhanced Curling
Safe Heating Method:
- Hair Dryer Method: Gently warm the curler with a hair dryer on low heat for 3-5 seconds
- Temperature Test: Always test on your wrist before use - it should feel barely warm, not hot
- Safety First: Never use direct flame, hot water, or excessive heat that could burn your eyelids
- Cool Down: Allow 10-15 seconds to cool to comfortable temperature before curling
HEATING PRECAUTIONS:
- Test temperature every time before use
- Never heat damaged or repaired curlers
- Discontinue if any discomfort occurs
- Consider investing in a heated eyelash curler designed for this purpose
Maintenance Schedule Quick Reference
ROUTINE MAINTENANCE CALENDAR:
- Daily: Clean with 70% alcohol after each use
- Weekly: Deep clean with mild soap (for daily users)
- Monthly: Apply thin mineral oil layer to prevent rust
- Every 2-3 months: Replace rubber pads regardless of appearance
- Every 6-12 months: Replace entire curler for optimal safety and performance
jjn jmFrequently Asked Questions
Can I use super glue to fix my curler?
Absolutely NO - never use super glue, cyanoacrylate, or any strong chemical adhesives to fix an eyelash curler. These substances are toxic near eyes, can cause chemical burns, and create unsafe repair joints that may fail during use. Replace damaged curlers instead.
How often should I clean my eyelash curler?
Clean your curler every few uses or as needed to maintain hygiene and performance.
Why does my eyelash curler not work anymore?
Your eyelash curler may stop working due to worn rubber pads that have lost elasticity, loose screws causing wobbling, bent frame affecting alignment, or accumulated makeup residue blocking the mechanism. Check these components and follow the repair steps outlined above.
How to fix curled lash lift?
If you're referring to over-curled lashes from a lash lift treatment, gently brush them with a clean spoolie brush and apply a nourishing lash serum. For an eyelash curler that over-curls, reduce pressure and hold time, or replace worn pads that may be gripping too tightly.
Can you replace the rubber on an eyelash curler?
Yes, most eyelash curlers have replaceable rubber pads. Remove the old pads carefully, clean the curler, cut replacement rubber to the same size, and attach the new pads securely. Use pads specifically designed for your curler model for best results.
How to know if an eyelash curler is broken?
Signs your curler is broken include: uneven curling, loose or wobbly handles, cracked or missing rubber pads, bent frame, rust spots, handles that won't stay closed, or any sharp edges. If multiple components are damaged or safety is compromised, replace the curler.
Conclusion
Maintaining and repairing your eyelash curler doesn't have to be complicated. Most issues can be resolved with basic tools and replacement parts. Regular cleaning, proper storage, and gentle usage will extend your curler's lifespan significantly. When repairs aren't enough, investing in a quality replacement curler ensures beautiful, safely curled lashes for years to come.
Remember to prioritize eye safety above all else - when in doubt, replace rather than risk injury with a damaged tool.